
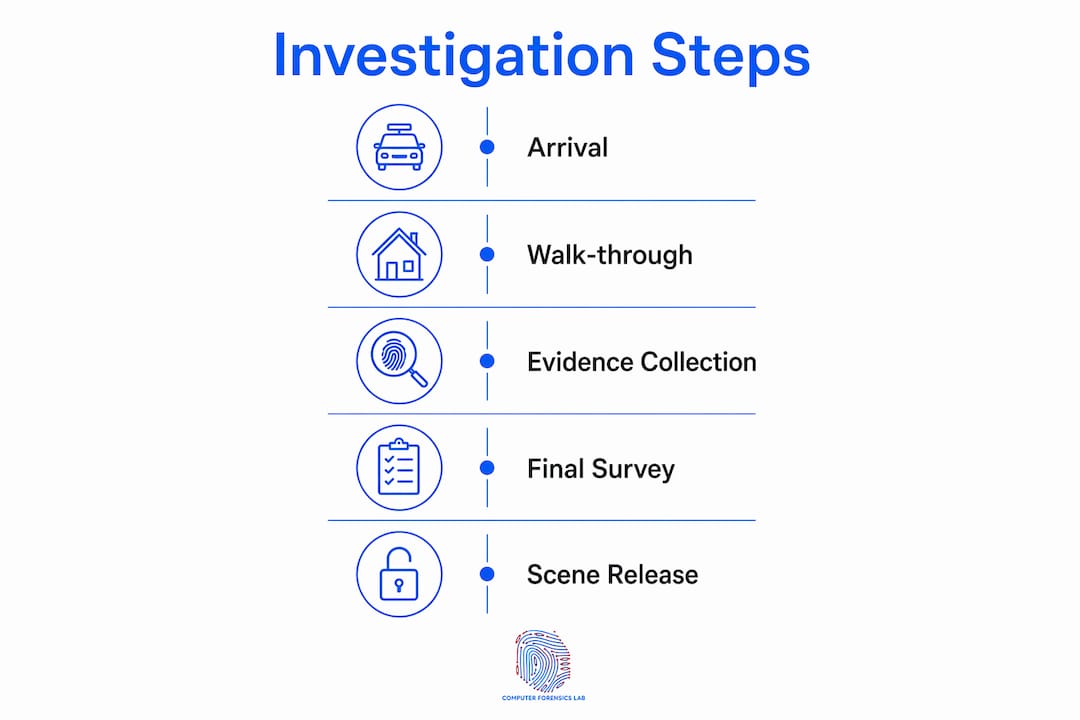
Every forensically sound crime scene investigation follows the same ordered sequence: initial response and scene security, preliminary walk-through and strategy development, systematic search and evidence collection, digital preservation and acquisition, and final survey with scene release. The steps to a crime scene investigation that produce court-admissible evidence in the UK are grounded in ENFSI best-practice standards and NIJ/DOJ guidance, both of which treat contemporaneous documentation and chain-of-custody records as non-negotiable from the moment of arrival.
The core sequence, mapped to those standards, is:
- Preserve life — render first aid and call emergency services before any forensic action.
- Secure and cordon the scene — establish a perimeter; record names, times, and agency details of every responder on arrival.
- Conduct a preliminary walk-through — assess, do not collect; identify fragile or perishable evidence for immediate protection.
- Develop an examination strategy — assign roles, confirm legal authority, request specialist resources.
- Systematic search and evidence collection — photograph, mark, package, and label in sequence; prevent cross-contamination.
- Preserve and acquire digital evidence — perform bit-stream imaging with immediate cryptographic hashing; maintain a continuous chain-of-custody log.
- Final survey and scene release — confirm all items and equipment are accounted for; record release authority and time.
Table of Contents
- Step-by-step physical crime scene investigation: arrival to release
- How digital evidence integrates with physical crime scene procedures
- UK legal compliance and evidential admissibility
- Practical on-scene checklist and sample evidence log
- When to involve a specialist digital forensics provider
- Key takeaways
- The walk-through is where most investigations are won or lost
- Computerforensicslab: specialist digital forensics for UK legal teams
- Authoritative sources and further reading
Step-by-step physical crime scene investigation: arrival to release
1. Initial response and scene security
The initial responding officer must record names, times, and agency details of all personnel present from the outset — this contemporaneous audit trail is the foundation of chain-of-custody documentation. After preserving life and summoning emergency services, the officer secures the perimeter, prevents unauthorised access, and notes any persons or vehicles leaving the vicinity. Assume the crime is ongoing until assessed otherwise.
- Log dispatch information: address, time, date, type of call, parties involved.
- Observe and record environmental conditions, potential secondary scenes, and any evidence of disturbance at the perimeter.
- Brief the investigator in charge before transferring scene control; remain until formally relieved.
2. Preliminary walk-through and initial documentation
The walk-through is an assessment exercise, not a collection exercise. Its purpose is to identify hazards, establish a safe path of entry and exit, and locate fragile or perishable evidence that requires immediate protection. Rushing to collect at this stage is one of the most common causes of admissibility failure.
- Use personal protective equipment (PPE) to prevent biological contamination.
- Prepare rough sketches and preliminary notes; photograph fragile evidence immediately if deferral would risk loss.
- Note the condition of doors, windows, lighting, and any signs of disturbance.
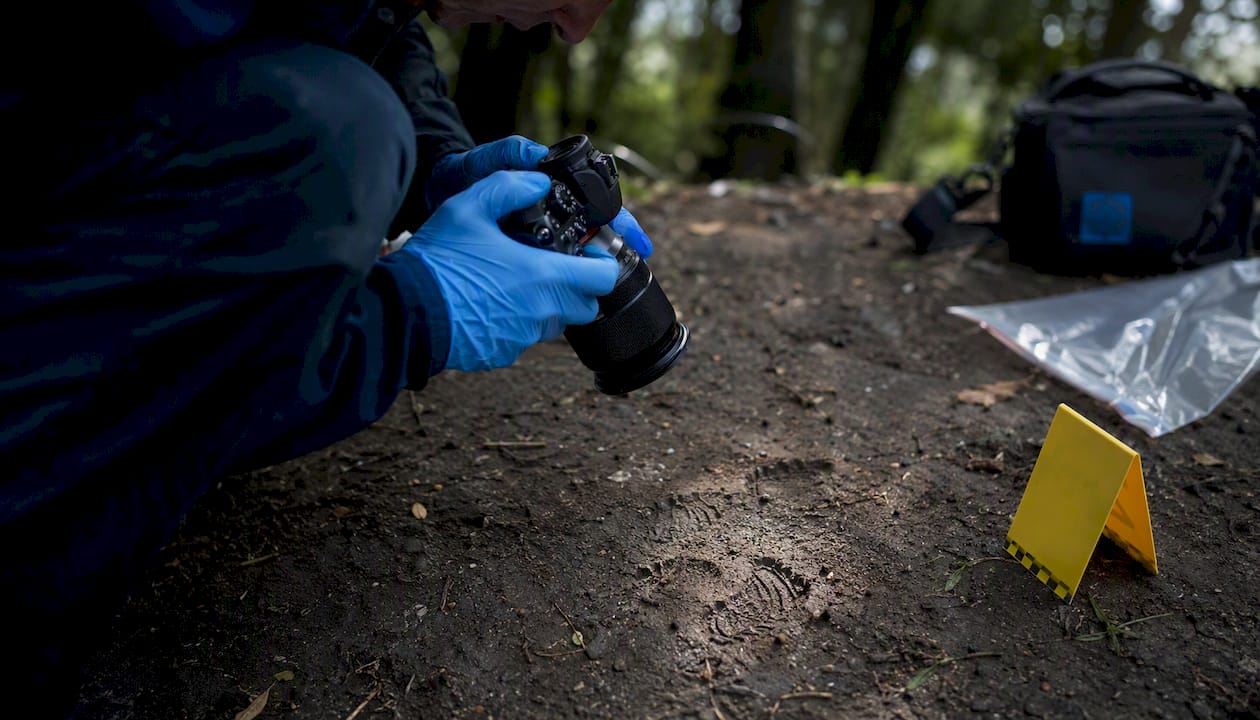
Pro Tip: Photograph fragile evidence — footwear impressions, blood pooling, transient trace material — before the full team enters. A single footfall can destroy evidence that no subsequent technique can recover.
3. Examination strategy and team composition
Following the walk-through, the investigator in charge determines team composition, assigns specialist roles (photography, latent prints, evidence collection), and confirms the legal authority under which the search proceeds. Cordon management continues throughout; entry and exit must be logged at all times.
- Prioritise areas and evidence types based on the preliminary assessment.
- Request additional resources — forensic specialists, prosecutors, digital forensics providers — before systematic search begins.
- Establish a secure staging area for equipment and temporary evidence storage.
4. Systematic search and evidence collection
The four recognised search patterns — lane/strip, grid, zone, and spiral — should be selected based on scene size and available personnel. Each area must be marked as complete before the team advances. Photography follows a three-tier sequence: wide-angle overview, medium-range context, and close-up with measurement scale.
- Label and package each item sequentially; use appropriate containers (paper for biological, sealed bags for digital devices).
- Prevent cross-contamination by changing gloves between items and using separate packaging for each exhibit.
- Record collector name, time, and location for every item at the point of collection.
5. Final survey and scene release
The final survey confirms that all evidence, equipment, and materials generated during the investigation are accounted for before the scene is released. A debriefing team reviews the case file, confirms documentation is complete, and records the name and authority of the person releasing the scene, together with the time of release.
How digital evidence integrates with physical crime scene procedures
The standard digital forensics workflow comprises five phases: preparation, identification and survey, preservation and acquisition, examination and analysis, and reporting. These phases run in parallel with physical CSI stages, not after them.
Preservation and acquisition: the critical phase
Never work on original media. Create a verified forensic image using bit-stream imaging, record the cryptographic hash value immediately upon capture, and store the original in a secure location. A write-blocker must be in place before any connection to the original device. Where a system is live and powered on, volatile data — running processes, network connections, RAM contents — must be captured before shutdown, as it is lost permanently once power is removed.
- Document device state on discovery: powered on or off, network connections active, screen content.
- Seize volatile data first if the device is live; otherwise power down and transport securely.
- Maintain chain-of-custody records for digital evidence at every transfer point, recording hash values at acquisition, at transfer, and before court presentation.
Pro Tip: Use SHA-256 rather than MD5 for hashing digital images. MD5 collision vulnerabilities make it a weaker evidential standard in UK courts; SHA-256 provides stronger integrity verification.
Acquisition options: a practical comparison
| Method | Best suited to | Key advantage | Legal/practical note |
|---|---|---|---|
| Live acquisition | Powered-on systems with volatile data | Captures RAM, active processes, network state | Must be documented; alters system state minimally |
| Forensic imaging (offline) | Powered-off devices, storage media | Bit-stream copy; fully verifiable via hash | Requires write-blocker; preferred for court |
| Cloud/API extraction | Remote accounts, SaaS platforms | Accesses data not present on physical device | Requires lawful authority (e.g. court order or consent) |
Examination, analysis, and reporting
Apply the scientific method during analysis: form a hypothesis about where relevant artefacts reside, test it empirically, and document the reasoning. This approach — observation, hypothesis, testing, conclusion — is what distinguishes a defensible expert report from an assertion. The final report must detail findings, methodology, tools used, and the complete chain of custody. For digital evidence preservation methods, maintaining two verified copies (original secured, working copy for analysis) is best practice.
UK legal compliance and evidential admissibility
Legal authority and search powers
Every entry and seizure action requires documented authority. Written authorisation must define the scope of the search and the categories of evidence that may be collected, preventing scope creep that could expose the investigation to legal challenge. Obtain consent or a warrant before collection; record the authority reference on every exhibit label.
Chain of custody and ISO/IEC 17025
Chain-of-custody records must capture every handover: who transferred the item, to whom, at what time, and in what condition. Laboratory accreditation to ISO/IEC 17025 provides independent verification that analytical processes meet recognised quality standards, which carries weight when evidence is challenged in court. Document provenance from scene to laboratory to courtroom without gaps.
- Record hash values at acquisition, at each transfer, and immediately before presentation.
- Use tamper-evident packaging; note any damage or anomaly on the exhibit label.
- Retain all packaging materials — they form part of the evidential record.
Data protection and proportionality
Under UK data-protection law, investigators must document the lawful basis for processing personal data, minimise exposure of irrelevant private information, and retain only what is proportionate to the investigation. Bulk collection without documented justification creates both legal risk and admissibility risk.
Procedural failures during the walk-through, collection, or preservation phases can render evidence inadmissible. ENFSI guidance treats every action as potentially subject to court scrutiny; investigators should operate on that assumption throughout.
This article provides general information for practitioners and does not constitute legal advice. Confirm current powers and procedures with a qualified legal professional or the relevant primary authority for your specific case.
Practical on-scene checklist and sample evidence log
Immediate actions on arrival
- Preserve life; call emergency services.
- Secure the perimeter; prevent unauthorised access.
- Record names, times, and agencies of all responders.
- Photograph fragile evidence before the full team enters.
- Identify perishable evidence (biological, volatile digital data) for priority action.
- Confirm legal authority for entry and search.
- Call specialist resources — digital forensics, forensic pathology — before systematic search.
Sample evidence log fields
Each entry must be made contemporaneously, not reconstructed later. For chain-of-custody documentation, every field below is required:
- Item ID — sequential exhibit reference (e.g. EX-001).
- Description — make, model, colour, condition, distinguishing features.
- Location found — precise location with reference to a fixed point or sketch.
- Collector — full name and role.
- Date and time — to the minute; use 24-hour clock.
- Condition on recovery — powered on/off, packaging integrity, visible damage.
- Hash value (digital items) — algorithm used (SHA-256 recommended), value recorded at acquisition.
- Chain-of-custody entries — each subsequent handler, date, time, and reason for transfer.
For perishable biological evidence, note ambient temperature and packaging method. For digital devices, photograph the screen state before any interaction.
When to involve a specialist digital forensics provider
Objective triggers for escalation
Some investigations exceed the technical capacity of on-scene teams. Escalate to a specialist provider when any of the following apply:
- Encrypted or damaged storage — full-disk encryption, RAID arrays, or physically damaged media require specialist tools and cleanroom recovery.
- Cloud or remote data — accessing data held in SaaS platforms, cloud storage, or remote servers requires API-level extraction and lawful authority management.
- Large data volumes — cases involving terabytes of data or multiple devices require enterprise-grade processing and keyword filtering.
- Live network forensics — active intrusions or ongoing data exfiltration require real-time capture capabilities.
- Court deadlines — tight disclosure timelines require fast-turnaround imaging and analysis with expert witness reporting.
- Anti-forensics indicators — evidence of wiping, file-system manipulation, or steganography requires specialist counter-forensics techniques.
Decision flow for escalation
- Assess whether on-scene capability covers the device types and data volumes present.
- If not, secure devices immediately: do not power on, do not connect to networks, photograph current state.
- Record all prior actions taken and hash values already generated.
- Prepare legal authorisations and scene notes for handover.
- Contact the specialist provider with: device states, initial hashes, chain-of-custody entries, and the scope of the legal authority.
Handover from first responder to specialist is a high-risk moment. Incoming specialists must record all prior actions and direct any necessary mitigation to prevent ongoing evidence loss. A structured digital asset incident response checklist can help enterprise teams prepare for this handover systematically.
Key takeaways
A forensically sound investigation treats the scene as a single, unrepeatable opportunity: every action from arrival to scene release either strengthens or weakens the evidential record.
| Point | Details |
|---|---|
| Preserve life before evidence | No forensic action takes priority over life preservation; document the sequence of emergency actions taken. |
| Walk-through is assessment only | Collecting during the walk-through contaminates strategy; defer collection until the examination plan is confirmed. |
| Hash digital images immediately | Record the SHA-256 hash at acquisition, at each transfer, and before court presentation to prove integrity. |
| Document every handover | Chain-of-custody gaps at transfer points are the most common cause of admissibility challenge in UK proceedings. |
| Computerforensicslab for specialist cases | For encrypted media, cloud data, or court-deadline cases, Computerforensicslab provides forensic imaging, expert witness reports, and full chain-of-custody documentation. |
The walk-through is where most investigations are won or lost
The forensic community spends considerable effort debating acquisition tools and hashing algorithms, yet the most consequential decisions in any investigation happen in the first twenty minutes on scene. Rushing the walk-through — or skipping it entirely to begin collection — is the single most damaging procedural error practitioners make, and it is almost always driven by external pressure: a senior officer wanting results, a tight timeline, or simple inexperience with the discipline the walk-through demands.
The deeper issue is that digital and physical evidence are not separate streams. Device location, screen timestamps, and usage history can corroborate or directly contradict witness accounts — but only if the device’s state at discovery is documented before anyone touches it. A phone found face-down, screen off, in a specific location tells a different story from one found active and unlocked. That distinction is lost the moment someone picks it up without photographing it first.
Investigators should operate on the assumption that every action will be challenged in court. That is not paranoia; it is the professional standard that ENFSI guidance and NIJ practice both reflect. Procedural discipline during the walk-through and collection phases is what converts a scene into an admissible evidential record.
Computerforensicslab: specialist digital forensics for UK legal teams
When a case involves encrypted devices, cloud-hosted data, or a disclosure deadline that on-scene resources cannot meet, Computerforensicslab provides the specialist capability to bridge that gap. Based in London and working with legal professionals and law enforcement across the UK, Computerforensicslab delivers forensic imaging and digital investigation services that maintain full chain-of-custody integrity from device seizure through to expert witness reporting.
On arrival, the team performs bit-stream imaging with immediate hash verification, documents device states, and produces a secure forensic copy for analysis — leaving the original media untouched and evidentially intact. Advanced analysis covers mobile devices, cloud accounts, deleted data recovery, and malware examination. Every engagement produces a court-ready expert witness report with documented methodology and provenance.
To engage Computerforensicslab, secure devices in their current state, record all prior actions and hashes, retain custody documentation, and contact the team with your legal authorisations and case details. For a full overview of capability, visit the digital forensics services page.
Authoritative sources and further reading
The following documents provide the formal procedural standards practitioners should consult for court preparation and SOP development:
- ENFSI Best Practice Manual for Scene of Crime Examination — the European standard for physical scene examination, strategy development, and release procedures; essential for admissibility arguments in UK courts.
- NIJ Crime Scene Investigation: A Guide for Law Enforcement — covers walk-through methodology, search patterns, documentation, and the final survey; the primary US/international operational reference.
- FBI/National Guidance on Crime Scene Practice — addresses final survey requirements and case file standards; useful for multi-agency investigations.
- NIST/OSAC Guidance on Initial Response — defines responder documentation requirements and contemporaneous record-keeping for chain-of-custody purposes.
- Digital Investigation Process (academic/industry reference) — consolidates the five-phase digital forensics model; covers hashing, bit-stream imaging, and the scientific method applied to digital analysis.
- DigFor-06 Handouts — practitioner teaching material on written authorisation, scope limitations, and lawful collection boundaries.