Permanently deleted files are frequently recoverable, provided the affected drive is left untouched, another destination drive is prepared for the recovered data, and the correct sequence is followed: check the Recycle Bin and backups first, then Windows File Recovery, then carving tools such as PhotoRec, then a professional lab if those steps fail.
TL;DR:
- Recovery chances diminish significantly if the affected drive continues to be used after deletion, especially on SSDs with TRIM enabled.
- Checking the Recycle Bin, cloud storage trash, or backups should always be the first step before attempting specialized recovery tools.
- Windows File Recovery offers two modes, with extensive mode recommended for formatted, damaged, or non-NTFS drives, using safe command patterns that avoid writing to the source drive.
- PhotoRec and TestDisk provide different approaches for recovery, with File Table recovery first, then raw file carving if needed, but they cannot restore filenames or folder structures in heavily damaged cases.
- Professional forensic recovery is necessary when data is legally sensitive, physically damaged, or previous attempts have failed, with proper imaging, chain of custody, and documentation crucial for evidential integrity.
Table of Contents
- Immediate checklist: do this now to preserve recoverability
- Fast restores: check Recycle Bin, cloud storage and Windows backups
- Windows File Recovery: modes and safe command patterns
- Open-source tools: TestDisk and PhotoRec workflow
- SSDs, TRIM and realistic limits to recovery
- When to call a professional: what forensic recovery involves
- Best practice and evidence integrity in professional recovery
- How to request professional recovery from Computer Forensics Lab
- Sources
- FAQ
Immediate checklist: do this now to preserve recoverability
The single most damaging mistake after deletion is continuing to use the affected drive. Every new file written to that disk, including a downloaded recovery tool, risks overwriting the very data you are trying to retrieve. Stopping activity immediately gives every later step a genuine chance of success.
Before running any recovery tool, complete the following:
- Stop all reading and writing on the affected drive, including opening folders or saving new files.
- Disable cloud syncing services such as OneDrive, Google Drive or Dropbox so they cannot overwrite local copies or push deletions upstream.
- Install or run recovery software from a different computer, or from removable media, rather than onto the affected drive.
- Connect a separate external drive to hold recovered files; never write recovered data back to the source drive.
- Where the data may later be needed as evidence, create a full image or clone of the drive and carry out all recovery attempts on that image rather than the original.
Pro Tip: Label the external destination drive clearly before you begin, so a tired hand at 2am does not accidentally point the recovery tool back at the source disk.
Fast restores: check Recycle Bin, cloud storage and Windows backups
Before reaching for specialist software, rule out the simplest explanations. A large share of “permanently deleted” files are sitting in a bin, a trash folder or a backup version that most users never think to check.
- Open the Recycle Bin and search by name or date. Files deleted with Shift+Delete, or removed from a network share or USB drive, typically bypass the bin entirely and will not appear here.
- Check the online trash or version history of any cloud storage service in use. OneDrive, Google Drive and similar providers each retain deleted files for a limited period before permanent removal, so timing matters.
- Use File History if it was enabled before deletion. In File Explorer, right-click the parent folder, select “Restore previous versions” and choose a version dated before the deletion, a workflow Microsoft documents in its File History guidance.
- If File History was not running, check whether a full Windows backup image exists on an external drive or network location, which can restore an entire folder structure rather than a single file.
Restoring a single file from File History is usually enough when only one document or photo has gone missing. A full backup restore makes more sense after a larger loss, such as an accidental format or a corrupted user profile, but be aware that restoring an entire backup can overwrite newer files that were created after the backup was taken. Where none of these routes produce the file, the next step is a dedicated recovery tool rather than repeated searching, since further browsing only increases the risk of overwriting the deleted data.
Windows File Recovery: modes and safe command patterns
Windows File Recovery is Microsoft’s own command-line recovery tool, available from the Microsoft Store, and it is built specifically for local drives such as internal disks and USB sticks. It does not recover files from cloud storage, which needs the trash or version checks covered above.
The tool offers two main modes. Regular mode is faster and works well for recently deleted files on a healthy NTFS drive where the file system still holds useful records. Extensive mode scans more thoroughly by signature, and Microsoft’s own documentation recommends it for formatted, corrupted or FAT and exFAT drives where NTFS records are unavailable. Within Extensive mode, switches let you refine the search further:
- The
/nswitch narrows a search to a specific filename or path fragment, useful when you know roughly what you are looking for. - The
/segmentswitch targets known NTFS record segments, helpful when a partial file system structure survives. - The
/signatureswitch tells the tool to search by file type signature, the approach needed on FAT, exFAT or heavily damaged NTFS volumes.
A safe command always names the source drive letter and a separate destination drive, for example recovering from drive C to a folder on drive E, never back to C itself. Microsoft’s guidance stresses that destination space must be sufficient before the scan starts, since a full destination drive will halt recovery midway.
Recovery odds fall sharply the longer a drive stays in use after deletion, and Microsoft itself notes that overwritten sectors, particularly on SSDs, are unlikely to be recoverable at all. If a Regular mode scan finds nothing, switch to Extensive mode before concluding the file is gone, and stop the operation if the destination drive fills up rather than letting it fail partway through a recovery operation.
Open-source tools: TestDisk and PhotoRec workflow
TestDisk and PhotoRec, both maintained by CGSecurity, take different approaches and suit different situations. TestDisk works by scanning what remains of the file system table on FAT, exFAT and NTFS volumes, which means it can often recover files with their original names and folder structure intact, according to CGSecurity’s own documentation. PhotoRec instead ignores the file system entirely and searches raw disk sectors for recognisable file signatures, a technique known as file carving, which works even when the file system itself is badly damaged but cannot preserve filenames or folder paths.
A practical workflow looks like this:
- Run TestDisk first in read-only or analysis mode to check whether file table entries still exist before attempting any write operation.
- If TestDisk cannot rebuild a usable structure, move to PhotoRec and point its output to a separate external drive, never the source disk.
- Avoid a FAT32-formatted destination when recovering files larger than 4 gigabytes, since that file system cannot hold them.
- Review the results once the scan finishes, since PhotoRec organises recovered files into folders named
recup_dir.1,recup_dir.2and so on, with generated filenames rather than the originals.
Pro Tip: Sort PhotoRec’s recup_dir folders by file type or size first, since photos and documents are usually easier to identify by content than by their generated filenames.
Expect a mix of results. Recognisable file types such as JPEGs and common documents tend to carve back cleanly, while fragmented or unusual formats may return partial or corrupted files, a limitation CGSecurity’s PhotoRec documentation itself acknowledges.
SSDs, TRIM and realistic limits to recovery
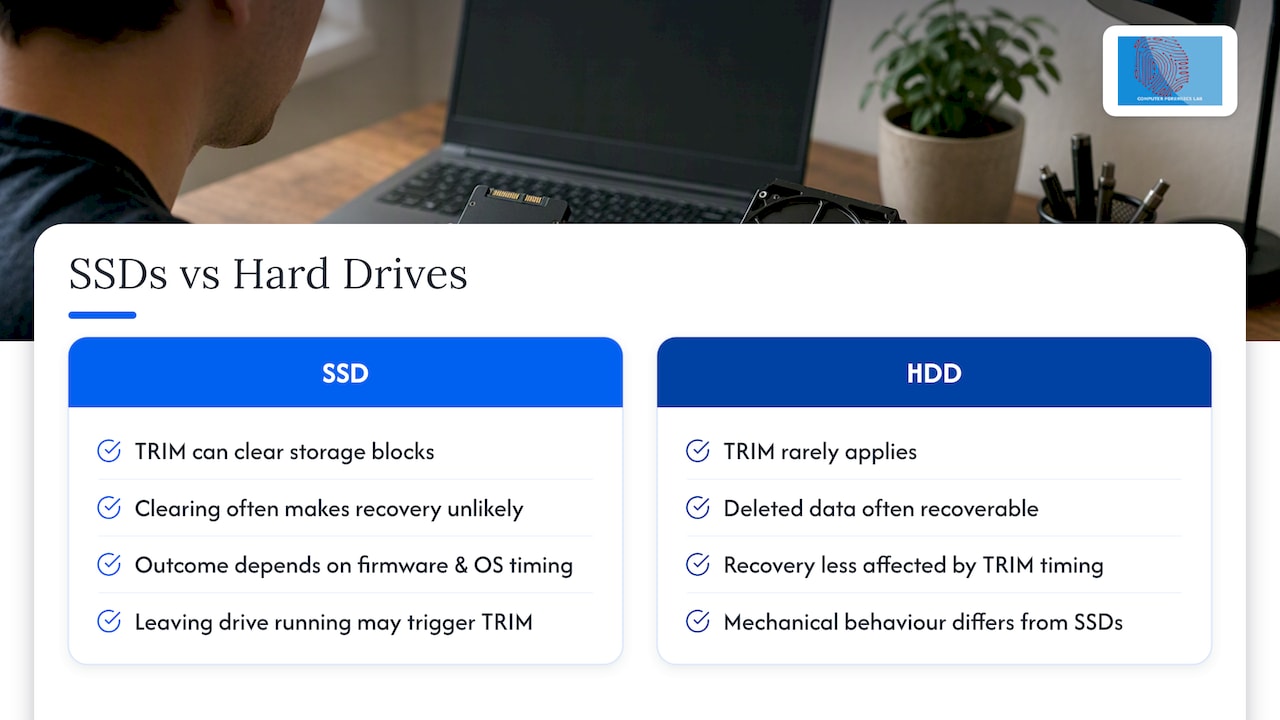
Solid-state drives behave very differently from traditional hard disks once a file is deleted, which is why Audit Ready SSD Destruction: Purge in Minutes or Shred to Particles explains the need for secure disposal methods unique to SSDs. TRIM is a command that the operating system sends to an SSD to tell it which storage blocks are no longer in use, and Kaspersky’s guidance on deleted file recovery notes that this process actively clears the underlying data, which often makes recovery unlikely on an SSD in a way that rarely applies to a mechanical hard drive.
The exact outcome depends on the drive’s firmware, how the operating system schedules TRIM operations, and how quickly you stopped using the disk after deletion. A drive that has TRIM enabled and has been left running for even a short period afterwards may have already cleared the relevant blocks beyond any software recovery. In that situation, a full-disk clone taken immediately, or a manufacturer’s own diagnostic utility, is worth trying, but readers should accept that some SSD deletions are simply not recoverable once TRIM has run its course.
When to call a professional: what forensic recovery involves
Certain situations call for a lab rather than further DIY attempts: physical damage such as clicking or grinding noises from a hard drive, an encrypted volume where the recovery key is unavailable, data that may serve as legal evidence, or repeated failed attempts that risk further damage to the drive.
A typical lab workflow, as outlined in our guide to recovering deleted data for legal cases, starts with forensic imaging of the device so that all subsequent work happens on a copy rather than the original. Specialised carving and reconstruction techniques follow, then validation of the recovered material, and finally a written report. Where the outcome may be used in court or an internal investigation, chain of custody records must be kept from the moment the drive is received.
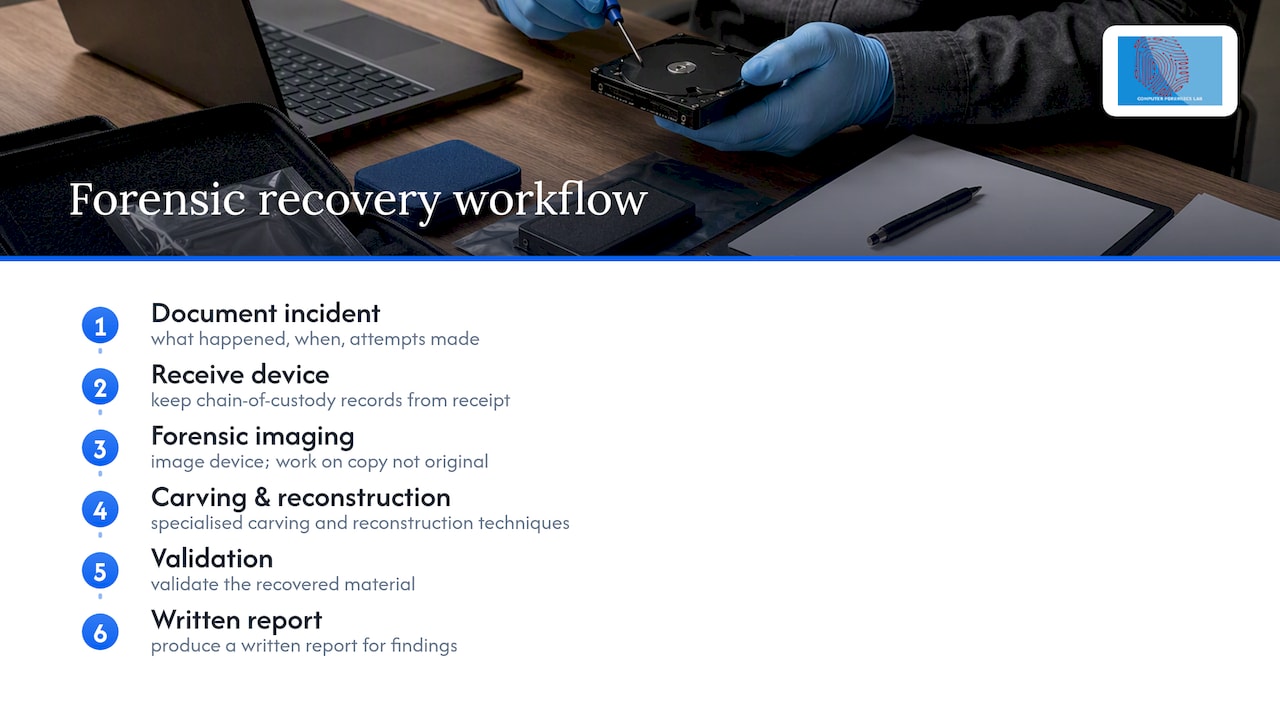
Before contacting a lab, note down what happened, when, and any recovery steps already attempted, since this shapes both the quote and the likely turnaround.
Best practice and evidence integrity in professional recovery
Professional recovery differs from DIY work mainly in what happens before any file is touched: imaging first, analysis on the copy, and documentation of every step. This preserves both the data and, where relevant, its evidential value for later scrutiny.
Anyone assessing a recovery lab should ask how it images drives, whether it follows a documented chain of custody, and whether its reports are written to withstand cross-examination in an expert witness context. A lab that cannot answer these plainly is not one to trust with data that matters.
*— Computer
How to request professional recovery from Computer Forensics Lab
When DIY tools have been exhausted, or when recovered data needs to hold up under legal scrutiny, forensic data recovery becomes the sensible next step. Some professional labs carry out forensic data recovery, full drive imaging and court-ready reporting for legal, corporate and private clients.
First contact typically involves:
- A short triage conversation about the device, the type of loss and any recovery already attempted.
- A quote based on the drive’s condition and the work required.
- Imaging of the device under a documented chain of custody before any recovery work begins.
Details on the full range of services are available on the Computer Forensics Lab website, where a prompt assessment can be arranged.
Sources
Readers wanting the primary sources behind these steps can consult Microsoft’s Windows File Recovery documentation for command syntax and mode selection, CGSecurity’s TestDisk documentation for undelete and carving behaviour, and the Lenovo glossary entry on data carving for a plain explanation of how signature-based recovery works.
FAQ
Can I restore permanently deleted files?
Yes, often, provided the drive has not been overwritten and, on an SSD, TRIM has not already cleared the relevant blocks. Checking backups and cloud trash first, then trying Windows File Recovery or PhotoRec, recovers many deletions that feel permanent.
Are permanently deleted files really gone?
Not always immediately: deletion typically marks the space as available rather than erasing it outright, so the original data can remain until something else writes over it. On SSDs, TRIM often clears that data proactively, which is why recovery odds drop faster than on a hard disk.
How to recover deleted files that are not in the Recycle Bin?
Files skipped the Recycle Bin because of a Shift+Delete, a network location or a format, so start with File History or a Windows backup if either was enabled. If neither applies, Windows File Recovery in Extensive mode or a carving tool like PhotoRec is the next step, working from a separate destination drive.
How to recover 2 years back deleted photos?
Recovery this far back depends entirely on whether a backup, cloud version history or an untouched drive image exists from that period, since most Recycle Bin and cloud trash retention windows are far shorter. Where no backup survives and the drive has been in normal use since, a professional lab can assess whether any file table or carving traces remain, though success is never guaranteed after that much time.
What is file carving and why does it matter for recovery?
File carving scans raw disk sectors for recognisable file signatures rather than relying on file system records, which is why tools like PhotoRec can recover data even from a badly damaged or reformatted drive. The trade-off is that carved files usually lose their original names and folder structure, appearing instead in generated output folders.