Forensically recoverable SD card files demand immediate secure preservation, a bit-for-bit image captured under write-block, and validated hashing throughout. This sequence, aligned with SWGDE, ENFSI, NIST, and ISO/IEC 27037 standards, is what keeps recovered data admissible. This workflow provides a direct professional route to court-ready recovery and reporting.
TL;DR:
- Secure seizure procedures demand documenting authority, photographing the card in situ, and sealing it in an anti-static evidence bag before any handling.
- Forensic imaging requires connecting the SD card through a validated hardware write blocker and creating a bit-for-bit image with SHA-256 or MD5 hash verification performed during acquisition.
- Chip-off and JTAG techniques are only justifiable after non-destructive methods fail and involve risks of data loss due to thermal damage or retention errors.
- Chain of custody must record all handling steps, device details, and photographs, with hashes stored alongside the original and derived images to ensure evidence integrity.
- External labs are recommended for high-value, damaged, encrypted, or jurisdictionally sensitive cases, with early instruction preventing procedural gaps that can compromise evidence admissibility.
Table of Contents
- What should you do the moment an SD card is seized?
- How do forensic examiners image and hash an SD card?
- When do you need destructive recovery methods like chip-off or JTAG?
- What must the chain of custody documentation include?
- How is recovered data verified for court?
- When should you instruct a specialist forensic lab?
- Why do so many SD cards lose evidential value before they reach a lab?
- How Computer Forensics Lab handles SD card recovery instructions
- Key primary sources and standards
- Sources
- FAQ
What should you do the moment an SD card is seized?
Whoever seizes the card must confirm and record the legal basis for taking it before touching anything else. A warrant, written consent, or corporate authorisation to search company-owned devices all count, but the authority needs to be documented at the point of seizure, not reconstructed afterwards from memory.
From there, the sequence matters:
- Photograph the card in situ, including its housing, connector, and any surrounding device before removal.
- Record device state and identifiers: model, capacity, visible damage, serial number where printed, and any password or PIN disclosed by the owner.
- Isolate and bag the card in an anti-static evidence sleeve, sealed and labelled with a unique evidence identifier.
- Appoint a single evidence custodian responsible for contemporaneous notes from this point forward. NIST’s guidance on offsite examination specifically recommends designating one custodian to avoid disputes over who handled the item and when.
Do not attempt consumer-grade recovery software at this stage, and never insert the card into a laptop, camera, or card reader that isn’t part of a validated forensic setup. Every insertion into an untrusted host risks writing to the card, however briefly, and that alone can undermine an otherwise strong case.
How do forensic examiners image and hash an SD card?
The card’s physical write-protect switch is not a forensic safeguard. It is an advisory mechanical flag that some readers and operating systems simply ignore, so examiners always attach the card through a validated hardware write blocker rather than relying on the slider. Once the card is connected read-only, the imaging process follows a fixed sequence:
- Attach the card via a forensically validated adapter and hardware write blocker.
- Create a bit-for-bit image of the entire card, not a selective copy of visible files.
- Compute a cryptographic hash, typically MD5 or SHA-256, immediately after acquisition.
- Where the imaging tool supports it, record the hash “on the fly” during acquisition rather than only afterwards.
- Log the exact tool, version, and parameters used, since an unrecorded setting can make results difficult to reproduce later.
Tools such as dc3dd and dd remain common choices in casework, and commercial imagers offer similar functionality with more automated logging. Research into SD card acquisition using dc3dd alongside carving tools like foremost confirms that hash-on-the-fly imaging produces logs and MD5 verification that support later court testimony. The original card is then archived offline, and all subsequent work happens on the image, never the source.
Pro Tip: Keep the working copy and the archival image on separate storage media. If the working copy is corrupted during analysis, you still have an untouched image to fall back on without going near the original card again.
When do you need destructive recovery methods like chip-off or JTAG?
Non-destructive imaging fails when the card’s controller is damaged, the connector is physically broken, or the flash chip itself has degraded beyond what standard read commands can retrieve. At that point, specialist labs turn to more invasive techniques:
- JTAG (Joint Test Action Group) access uses debug ports on the card’s controller to pull raw data without removing the chip.
- ISP (in-system programming) reads the flash chip’s contents while it remains soldered to its board.
- Chip-off physically removes the NAND flash chip, usually using heat, and reads it directly on a specialist rig.
Chip-off is destructive and it is also the technique that introduces the most risk to data quality. Thermal removal accelerates NAND charge leakage, and research into chip-off recovery found retention errors can increase by two or more orders of magnitude once a chip has been desoldered. Delay compounds this: the longer a damaged card sits before proper handling, the more those retention errors accumulate. Labs that anticipate chip-off typically build in read-retry passes to recover data that a single read attempt would miss.
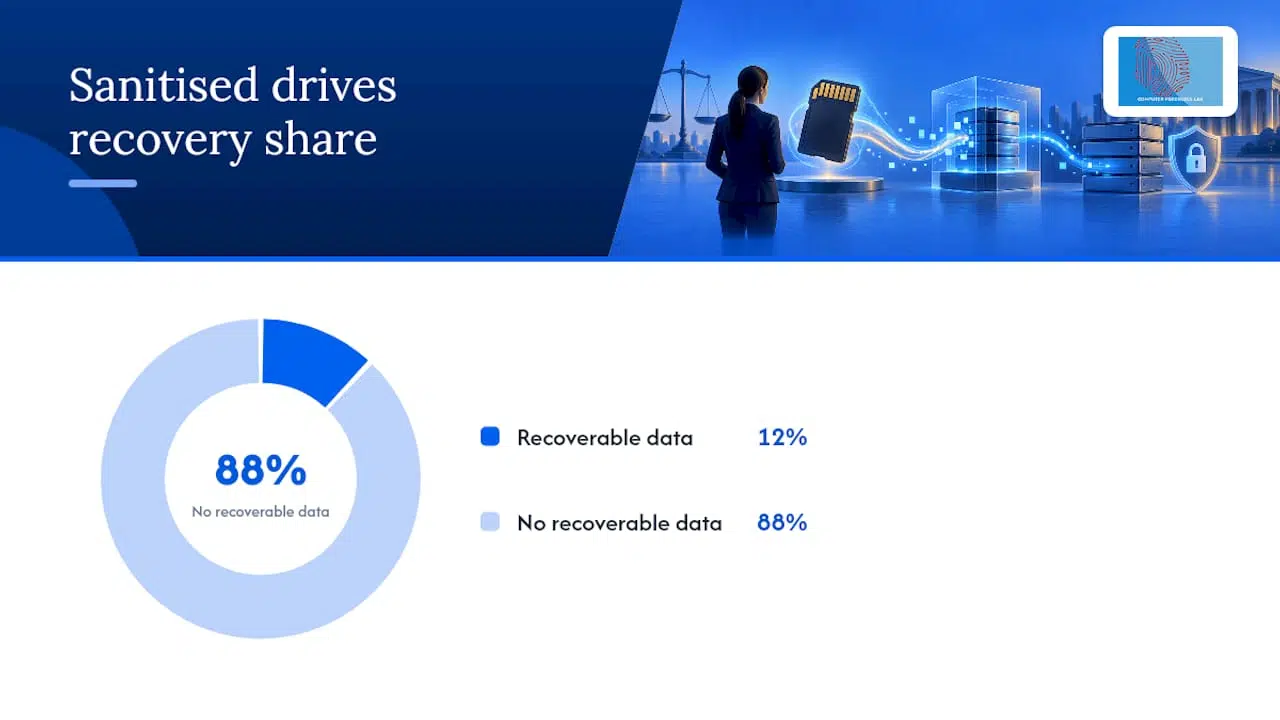
Chip-off should only follow authorisation and full documentation, and only after non-destructive imaging has genuinely been exhausted. Even then, recovery is never guaranteed. Prior formatting or deletion doesn’t necessarily help the opposing argument either: a study of 614 sanitised flash drives recovered non-trivial user data from over 12% of the sample, which means a “wiped” card is not automatically an empty one.
What must the chain of custody documentation include?
Admissibility rests on paperwork as much as technique. SWGDE’s best practices for digital evidence collection set out the minimum contemporaneous record every handler needs to keep:
- A unique evidence identifier assigned at first contact with the item.
- Date and time of every transfer, receipt, or examination step.
- The name, title, and signature of every person who handled the card.
- A description of the device’s physical state, including make, model, serial number, and any visible damage.
- Photographs taken at each significant stage, from seizure through to imaging.
SWGDE’s guidance is explicit that this record needs to cover every person who handled the item, not just the lead examiner. Alongside the physical chain of custody, hashing records for both the original card and every derived image need to be logged, together with the acquisition tool, its version, and any deviation from standard procedure.
ENFSI’s guideline on evaluative reporting adds a further layer: experts should favour activity-level propositions over source-level claims alone, and reports should be transparent about conditioning information and limitations rather than overstating certainty. Archive access needs controls too. Case files stored without restricted access risk commingling with unrelated matters, which is its own admissibility problem.
How is recovered data verified for court?
Verification is what turns a recovery into evidence a court can rely on. The baseline check is a hash comparison between the original card and the image: matching MD5 or SHA-256 values confirm the image is a faithful, unaltered copy, and those hash calculation logs need to be preserved alongside the image itself.
- Examiner notes, software logs, and timestamped screenshots documenting each analysis step.
- A recovered-file inventory that preserves filesystem metadata, not just file names.
- Tool validation statements confirming the software version used has been tested for the task, plus peer review notes where a second examiner checked the work.
- A documented procedure allowing an independent expert to repeat the analysis and reach the same result.
Forensic image management guidance from OSAC and NIST reinforces this: retaining both original and working images, with fixity checks at each stage, is what allows a defence expert to re-examine the same evidence without disputing its provenance. If a case reaches a contested hearing, this is the paperwork that gets tested first.
When should you instruct a specialist forensic lab?
Certain factors point firmly towards external instruction rather than in-house handling:
- The card carries high evidential value in litigation, a criminal matter, or a regulatory investigation.
- The card shows physical damage, water exposure, or connector failure.
- The data is encrypted or the device uses proprietary formatting.
- Expert witness testimony is likely to be required at trial.
- Jurisdictional or cross-border evidence rules apply to how the card can be handled.
Expect a signed chain of custody, the forensic image itself, validated hashes, full method logs, and an analyst report that states limitations plainly rather than glossing over them. Where testimony is needed, expert witness availability should be confirmed at instruction, not assumed later. Non-destructive imaging is quicker and cheaper than chip-off recovery, so timing and cost both hinge on how early a card reaches a lab equipped to assess it properly.
Pro Tip: Instruct the lab before attempting anything yourselves, even something that feels harmless like checking if the card still mounts. That single action can be the deviation a defence expert points to later.
Why do so many SD cards lose evidential value before they reach a lab?
The most common failure is not technical, it is procedural. Someone plugs the card into a personal laptop “just to check,” or runs a free recovery app before anyone thinks to log the action, and from that point the evidential chain has a gap that no amount of skilled analysis can close retroactively.
Validated imaging under write-block, hash verification at each stage, and tool validation records exist precisely to close that gap before it opens. Peer review adds a second check on conclusions before they reach a report. None of this is bureaucracy for its own sake. It is what lets an image taken today withstand cross-examination in eighteen months, when memories have faded and only the paperwork remains.
— Computer
How Computer Forensics Lab handles SD card recovery instructions
Computer Forensics Lab provides forensics data recovery built around chain of custody management, expert witness reporting, and forensic techniques designed to withstand scrutiny in litigation or criminal proceedings, giving legal teams a direct alternative to piecing together an in-house recovery process under time pressure. Engagement follows a defined path: instruction, secure transport of the card to the lab, forensic imaging under write-block, analysis of the resulting image, a written report covering methods and limitations, and expert witness availability where the matter proceeds to a hearing.
For solicitors, corporate legal teams, and law enforcement handling SD card evidence, the practical value is having every stage, from custody logs to hash records, produced to a consistent standard rather than assembled after the fact. Full detail on service scope, including electronic discovery and expert witness provision, is available on the specialist services page. To start an instruction, contact Computer Forensics Lab directly and arrange secure transport of the card before any further handling takes place.
Key primary sources and standards
- SWGDE best practices for digital evidence collection
- ENFSI guideline on evaluative reporting
- NIST guidance on offsite forensic examination
- ISO/IEC 27037 digital evidence guidelines
This article is general information, not a substitute for advice from a qualified lawyer. Consult a qualified legal professional about your own circumstances before acting on anything here.
Sources
- SWGDE — Best practices for digital evidence collection (2025)
- ENFSI — Guideline on evaluative reporting in forensic science
- NIST — Guidance on non‑routine offsite examination (2020)
- DFRWS/academic research on NAND flash chip‑off and read‑retry mitigation
- DFRWS — In search of lost data: flash sanitization practices
FAQ
Can deleted files be recovered from a formatted SD card?
Often, yes. Formatting or standard deletion removes file table entries rather than the underlying data, and one study recovered non-trivial user data from over 12% of 614 sanitised flash drives tested. Recovery odds depend heavily on how much new data has since been written to the card.
What is the difference between recovering deleted files and corrupted files?
Deleted file recovery reconstructs data that still physically exists on the card but is no longer referenced by the file system. Corrupted file recovery deals with data that may be partially overwritten, damaged, or affected by a failing controller, which often requires imaging and carving techniques rather than simple undelete tools.
Is a hardware write blocker always necessary?
Yes, for any recovery intended to be court-admissible. The SD card’s physical write-protect switch is only an advisory flag that some readers ignore, so a validated hardware write blocker is the only reliable way to guarantee the original card is never altered during imaging.
When is chip-off recovery justified?
Chip-off is reserved for cases where the card’s controller has failed or the connector is physically damaged, and only after non-destructive imaging has been ruled out. It is destructive, and thermal removal can increase retention errors by orders of magnitude, so read-retry mitigation should be part of the process.
What does Computer Forensics Lab provide for SD card cases?
Computer Forensics Lab provides forensic imaging, chain of custody documentation, hash verification, and analyst reporting for SD card recovery instructed by solicitors, law enforcement, and corporate clients. Current service scope and instruction details are available on the specialist computer forensics services page.