Most data loss caused by logical failure (accidental deletion, corruption, a failed update) can be recovered, while severe physical or electronic damage lowers the odds considerably. The single highest priority action is to stop using the drive immediately and create a sector-by-sector image before attempting any fix. From that image, we can pursue either DIY software recovery or, where the damage is mechanical or legal admissibility matters, professional cleanroom recovery.
TL;DR:
- Never initialize, format, run repair utilities, or install recovery software on the affected drive; each write can overwrite recoverable sectors.
- Image the drive sector by sector, scan the copy, and save recovered files to a separate healthy drive, starting with a quick scan.
- Clicking, grinding, failure to spin, or water or fire exposure calls for professional assessment; do not power on, dry, or clean a damaged drive.
- On SSDs, TRIM and internal garbage collection can erase deleted data even behind a write blocker, so avoid repeated power cycles and image promptly.
- For evidence, use a hardware write blocker, hash the image, and document chain of custody to preserve its integrity for legal review.
Table of Contents
- What to do right now: the first 30 to 60 minutes
- Imaging and cloning: how to make a forensically useful copy
- Step-by-step software recovery workflow for users
- SSD, NVMe and flash drives: special considerations
- When the fault is physical: what professionals do and how to prepare
- Quick prevention and backup measures to avoid future loss
- How to recognise signs of data tampering or deletion that require forensic expertise
- Differences between forensic data recovery and standard recovery methods
- Handling encrypted or password-protected drives in recovery
- Practitioner note from Computer Forensics Lab
- How Computer Forensics Lab can help with emergency and forensic recovery
- FAQ
- Sources
What to do right now: the first 30 to 60 minutes
The actions taken in the first hour after discovering data loss often determine whether recovery succeeds at all. Every additional write to a failing drive risks overwriting the very sectors that hold recoverable data, so the priority is to freeze the device in its current state.
- Power down the host system immediately rather than attempting a normal shutdown if the drive is making unusual noises or the system is unresponsive.
- If the drive is external, unplug it at the enclosure or cable; if it is internal, shut the machine down and remove the drive only if you are comfortable doing so, otherwise leave it in place for a specialist.
- Do not initialise, format, or run CHKDSK or any disk-repair utility against the affected drive, since these processes write to the disk and can destroy recoverable structures.
- Do not install recovery software directly onto the affected drive; any installation should go onto a separate, healthy drive.
- Document the device: make, model, serial number, approximate age, and the exact symptoms (clicking, not spinning, not recognised, blue screen, specific error codes), and photograph anything displayed on screen.
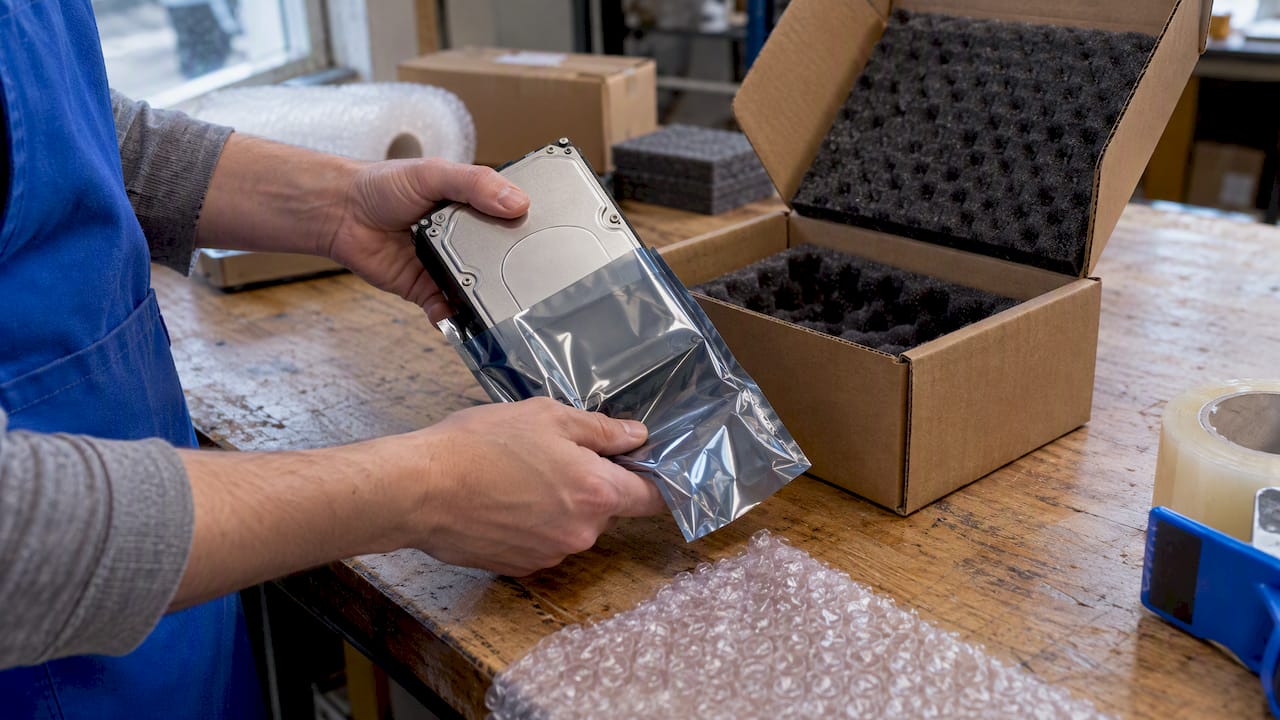
- If the drive needs to travel anywhere, including to a specialist, pack it in an anti-static bag inside a cushioned box, and store it somewhere dry and at room temperature until it is handled.
These six steps cost nothing and take only minutes, yet they preserve options that a single careless reboot can close off permanently.
Imaging and cloning: how to make a forensically useful copy
Before any recovery attempt touches the data itself, the original drive should be copied at the bitstream level: every sector, including slack space, unallocated space, and file system metadata, rather than just the visible files. This bitstream imaging approach preserves material that a simple file copy would miss, and it means every subsequent recovery attempt works against a copy rather than risking further damage to the original.
Write-blocking, whether hardware or software, prevents any accidental write to the source drive during imaging. Hardware write-blockers are the accepted standard for legal and corporate cases because they physically intercept write commands at the interface level, while software blockers are more convenient but carry a slightly higher risk of misconfiguration. A study comparing imaging with and without hardware write-blockers found that recovered file contents were often identical either way, though the overall media hash values differed, which is why hardware blocking remains best practice wherever the image might need to stand up in court.
In testing without a hardware write-blocker, recovered file-level content frequently matched images taken with one, though the resulting media hashes differed, which is why hardware blocking stays the accepted standard for work that may end up in court.
Practical tooling for this stage includes:
- GNU ddrescue, which copies readable sectors first and logs progress in a mapfile so an interrupted rescue can resume exactly where it left off.
- dd_rescue, which falls back to smaller block sizes on read errors and can approach damaged areas from both directions to maximise the data recovered, as described in its official manual.
- Forensic container formats such as E01 or AFF4, which bundle the image with metadata and built-in verification.
Once imaging finishes, hash the resulting image file (commonly with SHA-256) to fingerprint it; any future copy made from that image can be checked against the same hash to confirm nothing changed. For a RAID array, it is usually safer to image each member disk individually and reconstruct the array offline, rather than imaging through a controller whose health is uncertain.
Step-by-step software recovery workflow for users
Once a verified image exists, recovery work should happen on a separate, healthy workstation, never on the machine that produced the failure. Set up a destination drive with enough free space to hold every file you expect to recover, and keep it physically distinct from both the source drive and its image.
- Attach the failing drive (or its image) in read-only mode wherever the operating system allows it, so nothing can write back to the source.
- Mount or load the image file into your recovery tool rather than working directly against the physical drive a second time.
- Run a quick scan first, since this reads the existing file system index and recovers recently deleted files fastest when the structure is still intact.
- If the quick scan misses files, run a deep or signature-based scan, which reconstructs files from raw data patterns even when the file system entries are gone, at the cost of longer run times and generic file names.
- Recover found files to the separate destination drive, never back onto the source or its partition.
- Open a sample of recovered files to check integrity before assuming the job is complete, and run a second pass with different scan settings if key files are missing or corrupted.
Microsoft’s own command-line utility illustrates the pattern well. Windows File Recovery requires the destination to be a different drive from the source, and it offers a Regular mode for recently deleted files on healthy NTFS volumes alongside an Extensive mode that works across file systems and after formatting, scanning for file signatures rather than relying on the file table.
For a physically struggling drive rather than a simple deletion, a ddrescue pass plan works differently: run an initial pass to copy everything readable, consult the mapfile to see which sectors failed, then run further passes targeting only the gaps, often with smaller read sizes, until the mapfile shows no further improvement between attempts.
Pro Tip: Keep every recovery attempt working from the image, never from the original drive, so a failed or badly configured scan never costs you a second chance at the source data.
SSD, NVMe and flash drives: special considerations
Flash-based storage behaves very differently from spinning disks once data is deleted, which changes the recovery calculus substantially.
- SSD controllers run TRIM and background garbage collection, which actively clear marked-as-deleted blocks to keep write performance up, and this process can permanently erase recoverable data simply by the drive being powered on.
- A hardware write-blocker stops the host system from writing to the drive, but it cannot stop the drive’s own controller from running garbage collection internally, so write-blocking alone does not guarantee preservation on an SSD the way it does on a mechanical disk.
- The safest immediate step is to avoid powering the drive on and off repeatedly, since each power cycle gives the controller another opportunity to run cleanup routines.
- Where the drive can still be recognised, imaging it once, promptly, offers the best remaining chance before further use degrades the data further.
- Once standard imaging is no longer viable, the remaining options are factory diagnostic access through the controller or chip-off recovery, which reads the NAND chips directly; both are specialist procedures usually reserved for professional labs.
When the fault is physical: what professionals do and how to prepare
Certain symptoms point clearly away from a software fix and towards mechanical or electronic failure: a clicking or grinding noise, a drive that spins up but is never recognised by any system, a motor that does not spin at all, or a drive that was dropped, submerged, or exposed to fire. National Archives guidance is explicit that wet or badly damaged drives should not be dried, cleaned, or powered on by the owner, since doing so can finish the damage that a cleanroom recovery could otherwise work around.
Professional recovery in these cases typically follows a structured sequence:
- Intake assessment, including a visual and electronic check to classify the type and severity of the fault.
- Cleanroom disassembly for drives with platter or head damage, carried out in a particle-controlled environment to avoid introducing contaminants.
- Platter imaging, head stack replacement, or firmware repair, depending on which component has failed.
- Chip-off recovery for flash media where the controller itself is damaged beyond use.
Trustworthy providers back this work with itemised reports, documented chain of custody, and image hashes that let a client or court verify nothing changed during the process; archival guidance recommends choosing a specialist who supplies exactly this kind of paperwork rather than a vague promise of results. Our damaged hard drive evidence recovery service follows this same structured approach for clients dealing with mechanically compromised drives.
Pro Tip: Before shipping a damaged drive anywhere, ask the receiving lab for their expected turnaround, confidentiality terms, and a cost estimate in writing, and pack the drive in an anti-static bag inside a rigid, cushioned box.

Quick prevention and backup measures to avoid future loss
A workable backup routine removes most of the stress a failed drive otherwise creates, and it does not need to be complicated to be effective.
- Follow a three-copy rule: one local working copy, one offsite copy, and one cloud or rotating copy, updated on a schedule that matches how often your data changes.
- Use image-based backups for whole systems so a full machine can be restored quickly rather than reinstalling software and settings from scratch; a practical backup checklist sets out what a genuinely recoverable backup needs to include.
- Test restores periodically and verify checksums on backup files, since an unverified backup is only a guess at protection; guidance on backing up and restoring with Acronis walks through this process for a typical system drive.
- Encrypt backups that contain personal or commercially sensitive data, particularly any copy stored offsite or in the cloud.
How to recognise signs of data tampering or deletion that require forensic expertise
Some signs point beyond ordinary accidental loss towards deliberate interference, and these cases call for forensic handling rather than DIY recovery. Timestamps that do not match a plausible sequence of events, files that were deleted in bulk shortly before an audit or dispute, or evidence that a wiping utility ran on the drive are all indicators worth taking seriously.
Other signals include mismatched file metadata, such as a creation date that postdates a modification date, missing log files that should exist given the system’s normal operation, or a drive that shows signs of reformatting without a corresponding user action on record. Where any of these appear, the priority shifts from recovering as many files as possible to preserving the drive exactly as found. Running consumer recovery software at this stage risks overwriting evidence of what happened and altering metadata that a forensic examiner would otherwise rely on, so imaging with a documented chain of custody becomes the first step rather than an optional extra.
Differences between forensic data recovery and standard recovery methods
Standard data recovery aims to get files back; forensic data recovery aims to get files back while proving, to evidential standard, exactly how that was done. The practical steps often overlap (imaging, scanning, extracting) but the surrounding discipline differs sharply.
Forensic recovery insists on a hardware write-blocker wherever possible, documents every step in a chain of custody log, and hashes every image so its integrity can be verified independently at any later point, as forensic imaging references set out. Standard recovery, by contrast, is typically judged only on how many files come back intact, with no requirement to prove the process afterwards. The distinction matters most when the recovered data might end up supporting a legal claim, an employment dispute, or a criminal investigation, since a court will generally want to see that the data was handled in a way that could not have altered it. Our guide to recovering hard disk data for legal admissibility covers the procedural detail this standard requires.
Handling encrypted or password-protected drives in recovery
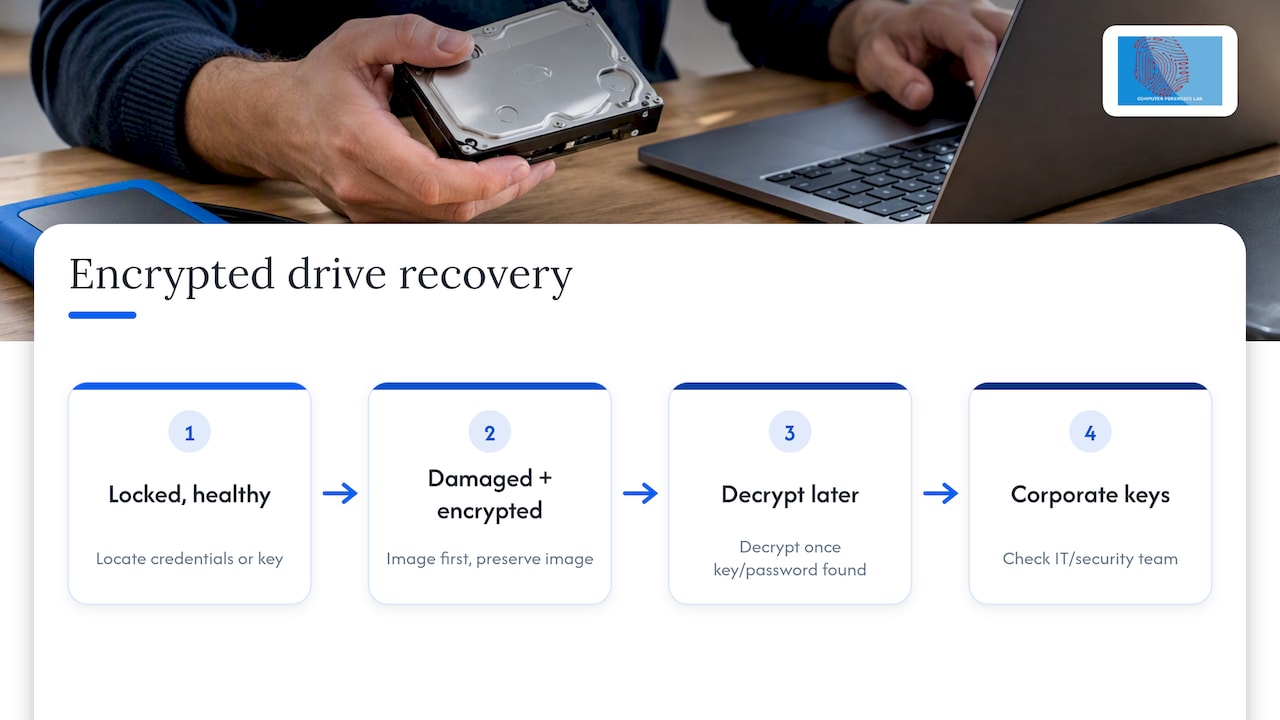
An encrypted or password-protected drive adds a layer that sits on top of, rather than replaces, the physical or logical recovery problem. If the drive itself is healthy and only locked, the priority is locating the correct credentials, recovery key, or, for full-disk encryption schemes, the original recovery certificate, since none of the imaging or scanning steps above can bypass encryption on a properly implemented system.
Where the drive is both encrypted and physically or logically damaged, imaging still needs to happen first, producing an encrypted image that is then decrypted separately once a verified key or password is available. Attempting to decrypt a failing drive directly, rather than imaging it first, risks losing the only readable copy if the drive fails completely partway through. For business drives protected under a corporate key management system, checking with the IT or security team responsible for key escrow is usually faster than attempting any technical workaround, and for cases where encryption forms part of a dispute or investigation, our guide to recovering deleted data for legal investigations addresses how encrypted evidence is typically handled.
Practitioner note from Computer Forensics Lab
Across the cases we see, the drives that come back with the most intact data are almost always the ones imaged early, before repeated power cycles or DIY fixes compounded the original fault. For every engagement we ensure the work stands up to scrutiny whether it ends up in a boardroom or a courtroom.
— Computer
How Computer Forensics Lab can help with emergency and forensic recovery
When a drive fails in circumstances where the data might matter legally, commercially, or simply irreplaceably, we offer forensic data recovery, emergency data recovery, and advanced data recovery, backed by expert witness reporting where a case requires it. Every engagement follows imaging and rigorous chain-of-custody discipline to help ensure the data recovered remains defensible if it is ever challenged.
At first contact, it helps us to know the device type, the symptoms you have observed, how urgent the recovery is, and whether you need the evidence chain preserved for legal purposes. Our specialist computer forensics services page sets out the full range of what we handle, and our hard drive recovery service page is the fastest route to requesting an estimate or emergency intake.
FAQ
Is it possible to recover data from a dead hard drive?
Often, yes, particularly when the fault lies in the electronics or read/write heads rather than the platters themselves. A drive that will not spin up or is not recognised by any system usually needs professional cleanroom assessment, since further attempts to power it on at home can worsen the damage.
How do you get files off a hard drive that will not turn on?
Stop trying to power the drive on repeatedly, since this is one of the fastest ways to turn a recoverable fault into an unrecoverable one. A drive in this state typically needs a specialist to open it in a controlled environment and image the platters directly rather than relying on consumer software, which cannot work without the drive spinning.
How do I get information off an old hard drive?
Connect it to a healthy system using a USB-to-SATA adapter or an external enclosure, then image it before running any recovery software, following the same sector-by-sector approach used for a failed drive. If the drive is old enough that the file system or partition table is unfamiliar, a deep or signature-based scan in your recovery tool, such as the Extensive mode in Windows File Recovery, usually finds more than a quick scan alone.
How can I recover data from a hard drive?
Start by stopping all use of the affected drive, then create a complete sector-by-sector image using a tool such as ddrescue before attempting anything else. From that image, run recovery software to a separate destination drive for logical faults, or send the original drive to a specialist for cleanroom work if the fault is mechanical or electronic.
Sources
- Disk Imaging – Dr. Mike Murphy
- National Archives — Electronic media emergency guidance
- Windows File Recovery documentation — Microsoft Support
- A Study of Forensic Imaging in the Absence of Write‑Blockers